我一直是 Laravel Livewire 的粉丝,自从它首次发布以来,我已经多次使用它为应用程序创建出色的用户界面。我发现自己经常做的一件事是创建可以传递其他内容的提取组件——例如,这样我就不会有 20 个不同的模态或滑动面板。
在本教程中,我将逐步讲解如何在您的 TALL 栈 应用程序中创建滑动面板组件,以便您也可以实现这种方法。
我假设您已经安装了 Laravel 和 Livewire,并且已设置了一个基本应用程序。我将使用 Tailwind UI 和 Tailwind CSS 进行样式设置,因为我完全不知道如何设计任何东西。
让我们从在 Livewire 中创建一个名为 SidePanel 的通用组件开始,该组件将包含打开和关闭面板所需的所有代码和控件。让我们开始构建。
php artisan livewire:make SidePanel --test首先,我们需要使状态可用,以便它可以处于打开或关闭状态,我敢肯定您会同意这是侧边栏的重要方面。
declare(strict_types=1); namespace App\Http\Livewire; use Illuminate\Contracts\View\View as ViewContract;use Illuminate\Support\Facades\View;use Livewire\Component; final class SidePanel extends Component{ public bool $open = false; public function render(): ViewContract { return View::make( view: 'livewire.side-panel', ); }}这里我们有一个标准的 Livewire 组件,根据我的个人意见进行了定制。到目前为止,我们只有一个名为 open 的属性——我们将在前端使用 AlpineJS 对其进行“绑定”。我们需要另外几个属性来允许我们显示面板,并且在没有传递组件时不会崩溃。
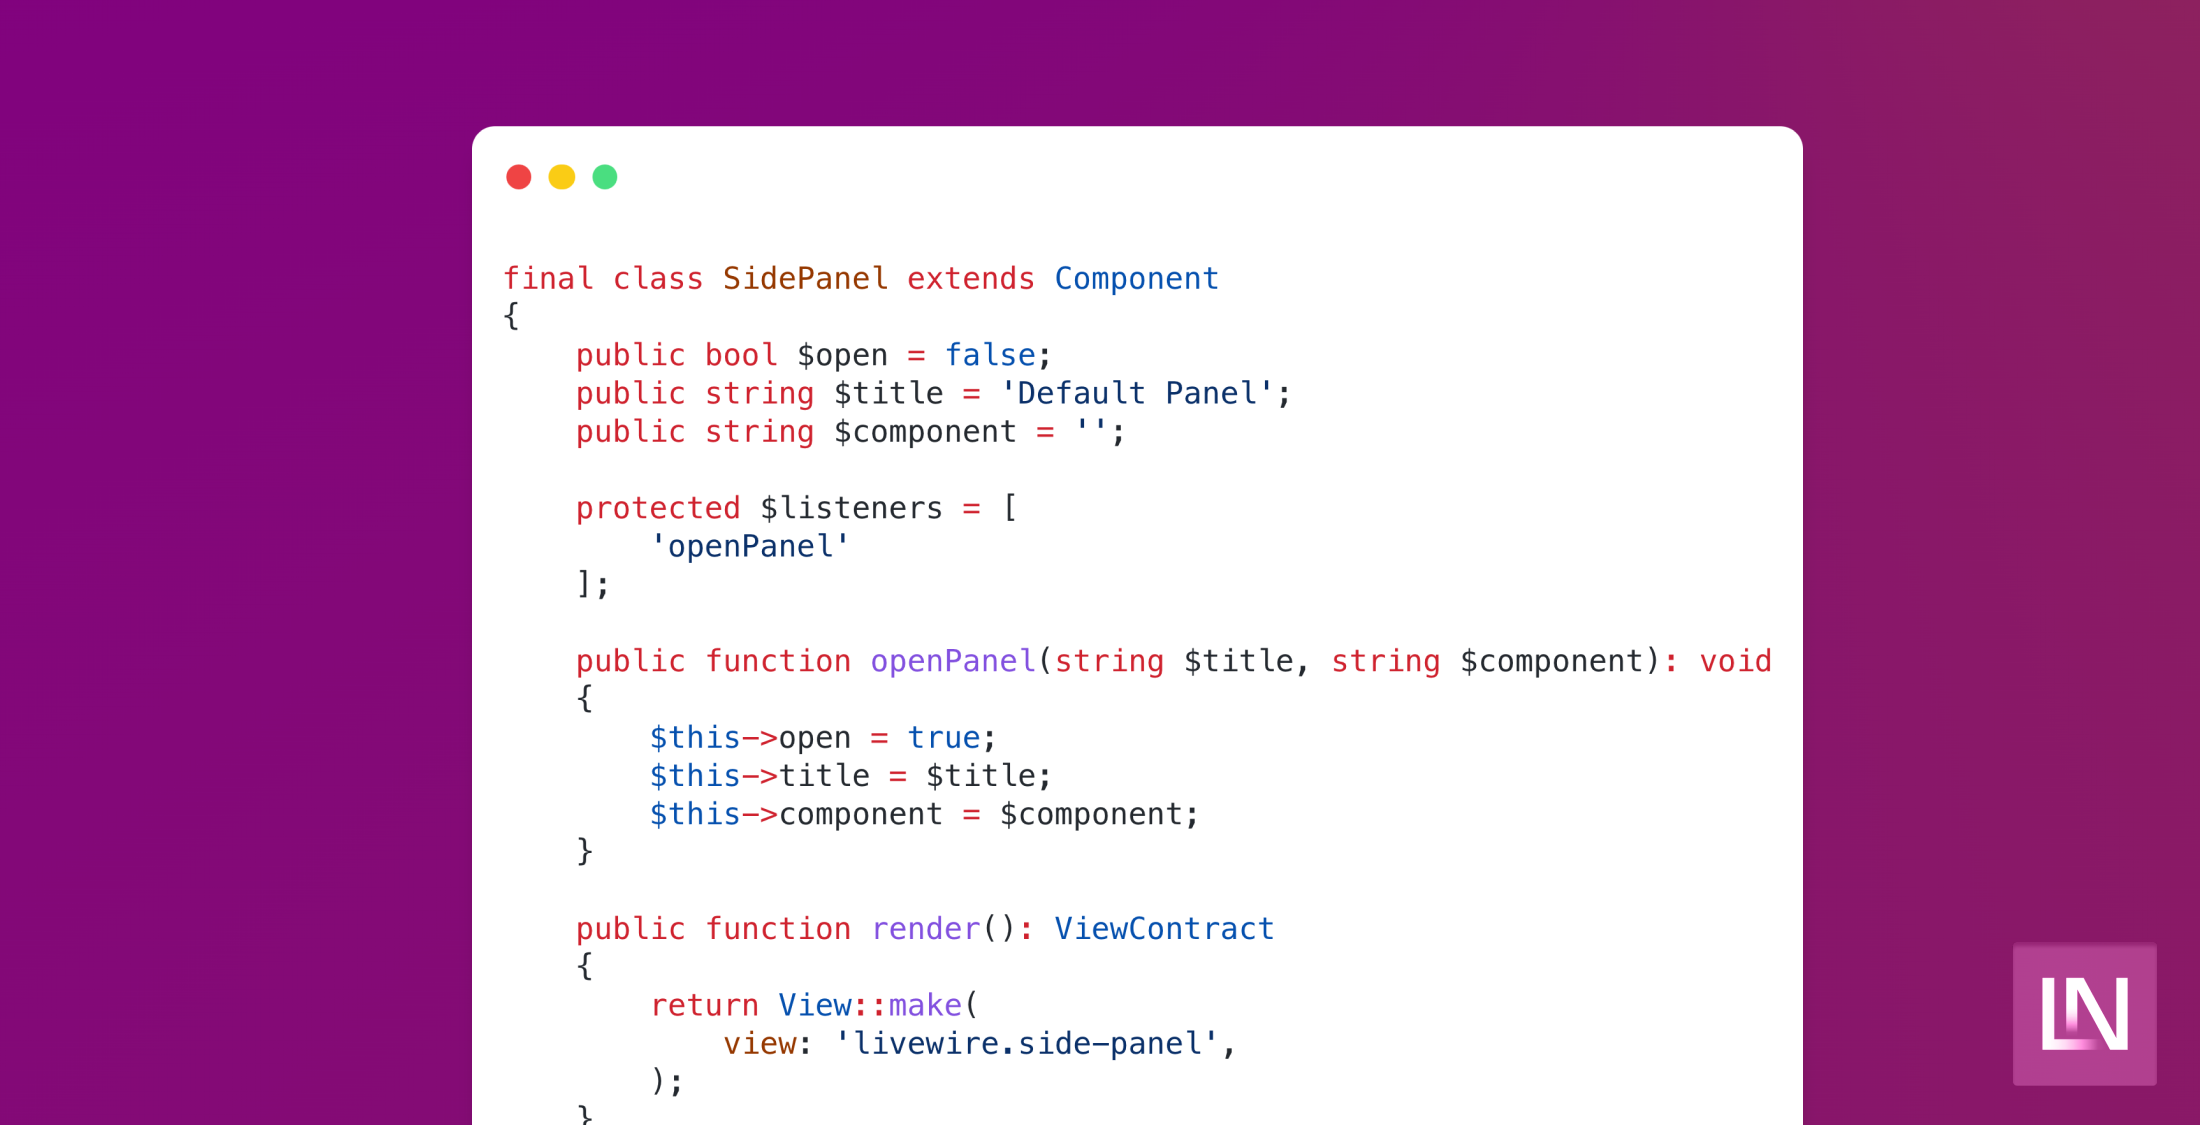
declare(strict_types=1); namespace App\Http\Livewire; use Illuminate\Contracts\View\View as ViewContract;use Illuminate\Support\Facades\View;use Livewire\Component; final class SidePanel extends Component{ public bool $open = false; public string $title = 'Default Panel'; public string $component = ''; public function render(): ViewContract { return View::make( view: 'livewire.side-panel', ); }}我们有一个默认标题和一个 component 属性,该属性允许我们选择要加载的组件。这样,与它交互的其他组件可以告诉它加载什么以及传递要显示的标题。让我们看看这个组件的模板
<section x-data="{ open: @entangle('open') }" @keydown.window.escape="open = false" x-show="open" x-cloak class="relative z-10" aria-labelledby="slide-over-title" x-ref="dialog" aria-modal="true"> <div x-show="open" x-cloak x-transition:enter="ease-in-out duration-500" x-transition:enter-start="opacity-0" x-transition:enter-end="opacity-100" x-transition:leave="ease-in-out duration-500" x-transition:leave-start="opacity-100" x-transition:leave-end="opacity-0" class="fixed inset-0 bg-gray-500 bg-opacity-75 transition-opacity" ></div> <div class="fixed inset-0 overflow-hidden"> <div class="absolute inset-0 overflow-hidden"> <div class="pointer-events-none fixed inset-y-0 right-0 flex max-w-full pl-10"> <div x-show="open" x-cloak x-transition:enter="transform transition ease-in-out duration-500 sm:duration-700" x-transition:enter-start="translate-x-full" x-transition:enter-end="translate-x-0" x-transition:leave="transform transition ease-in-out duration-500 sm:duration-700" x-transition:leave-start="translate-x-0" x-transition:leave-end="translate-x-full" class="pointer-events-auto w-screen max-w-md" @click.away="open = false" > <div class="flex h-full flex-col overflow-y-scroll bg-white py-6 shadow-xl"> <header class="px-4 sm:px-6"> <div class="flex items-start justify-between"> <h2 class="text-lg font-medium text-gray-900" id="slide-over-title"> Panel title </h2> <div class="ml-3 flex h-7 items-center"> <button type="button" class="rounded-md bg-white text-gray-400 hover:text-gray-500 focus:outline-none focus:ring-2 focus:ring-indigo-500 focus:ring-offset-2" @click="open = false" > <span class="sr-only">Close panel</span> <svg class="h-6 w-6" xmlns="http://www.w3.org/2000/svg" fill="none" viewBox="0 0 24 24" stroke-width="1.5" stroke="currentColor" aria-hidden="true"> <path stroke-linecap="round" stroke-linejoin="round" d="M6 18L18 6M6 6l12 12"></path> </svg> </button> </div> </div> </header> <article class="relative mt-6 flex-1 px-4 sm:px-6"> @if ($component) @livewire($component) @else <div class="absolute inset-0 px-4 sm:px-6"> <div class="h-full border-2 border-dashed border-gray-200" aria-hidden="true"></div> </div> @endif </article> </div> </div> </div> </div> </div></section>这里我们有很多标记来控制它的外观和行为,使用 @entangle 在 AlpineJS 和 Livewire 之间进行通信。我们检查 component 是否已设置,如果没有,则显示空状态。接下来,我们需要从其他组件中触发它——向它发送一些数据,以便我们可以选择要加载的组件以及要设置的标题。这将从 Livewire 或 Alpine 中工作,但在我的示例中,我将使用另一个 Livewire 组件来触发打开面板。
$this->emit('openPanel', 'New Title', 'component.name.with-namespace');我们使用 emit 方法传递三个参数。首先,是我们正在触发的事件名称。其次,是面板的标题。最后,我们希望传递组件本身,就像我们使用视图中的 livewire 指令加载它一样。
现在,我们需要要求我们的侧边栏组件监听此事件,并有一个方法来处理更新其属性的逻辑。
declare(strict_types=1); namespace App\Http\Livewire; use Illuminate\Contracts\View\View as ViewContract;use Illuminate\Support\Facades\View;use Livewire\Component; final class SidePanel extends Component{ public bool $open = false; public string $title = 'Default Panel'; public string $component = ''; protected $listeners = [ 'openPanel' ]; public function openPanel(string $title, string $component): void { $this->open = true; $this->title = $title; $this->component = $component; } public function render(): ViewContract { return View::make( view: 'livewire.side-panel', ); }}有了监听器接受所有必需的参数,以及 Alpine 处理打开和关闭状态——我们可以关闭此面板并替换显示的组件。
这种方法使我能够创建干净的用户界面,这些界面可以根据需要打开一个单独的组件。此外,我们传递到面板中的组件仍然可以用作视图的独立组件。
您如何在项目中处理这些用例?您认为这将在 Livewire v3 中如何改变?请在 Twitter 上告诉我们您的想法。

