在本教程中,我将逐步讲解如何使用 Vue.js 和 TailwindCSS 构建自定义闪存消息组件。我将在一个全新的 Laravel 5.8 项目中进行构建,但您可以将其改编为用于任何运行 Vue.js 和 TailwindCSS 的项目。
我们将构建的组件将具有“危险”主题和“成功”主题。您可以选择用“警告”主题或您认为合适的任何其他主题进行扩展。
先决条件
这是一个中级教程,因此我不会涵盖 Vue.js 和 TailwindCSS 的基础知识,以及如何在您的项目中设置它们。我将假设您已经按照其文档完成了这些操作。我还从 resources/js/app.js 文件中删除了所有样板 JavaScript 代码,只保留以下内容
window.Vue = require('vue'); const app = new Vue({ el: '#app',});在我的 routes/web.php 文件中,我从以下开始
<?php Route::view('/', 'welcome');在我的欢迎视图(resources/views/welcome.blade.php)中,我从以下开始
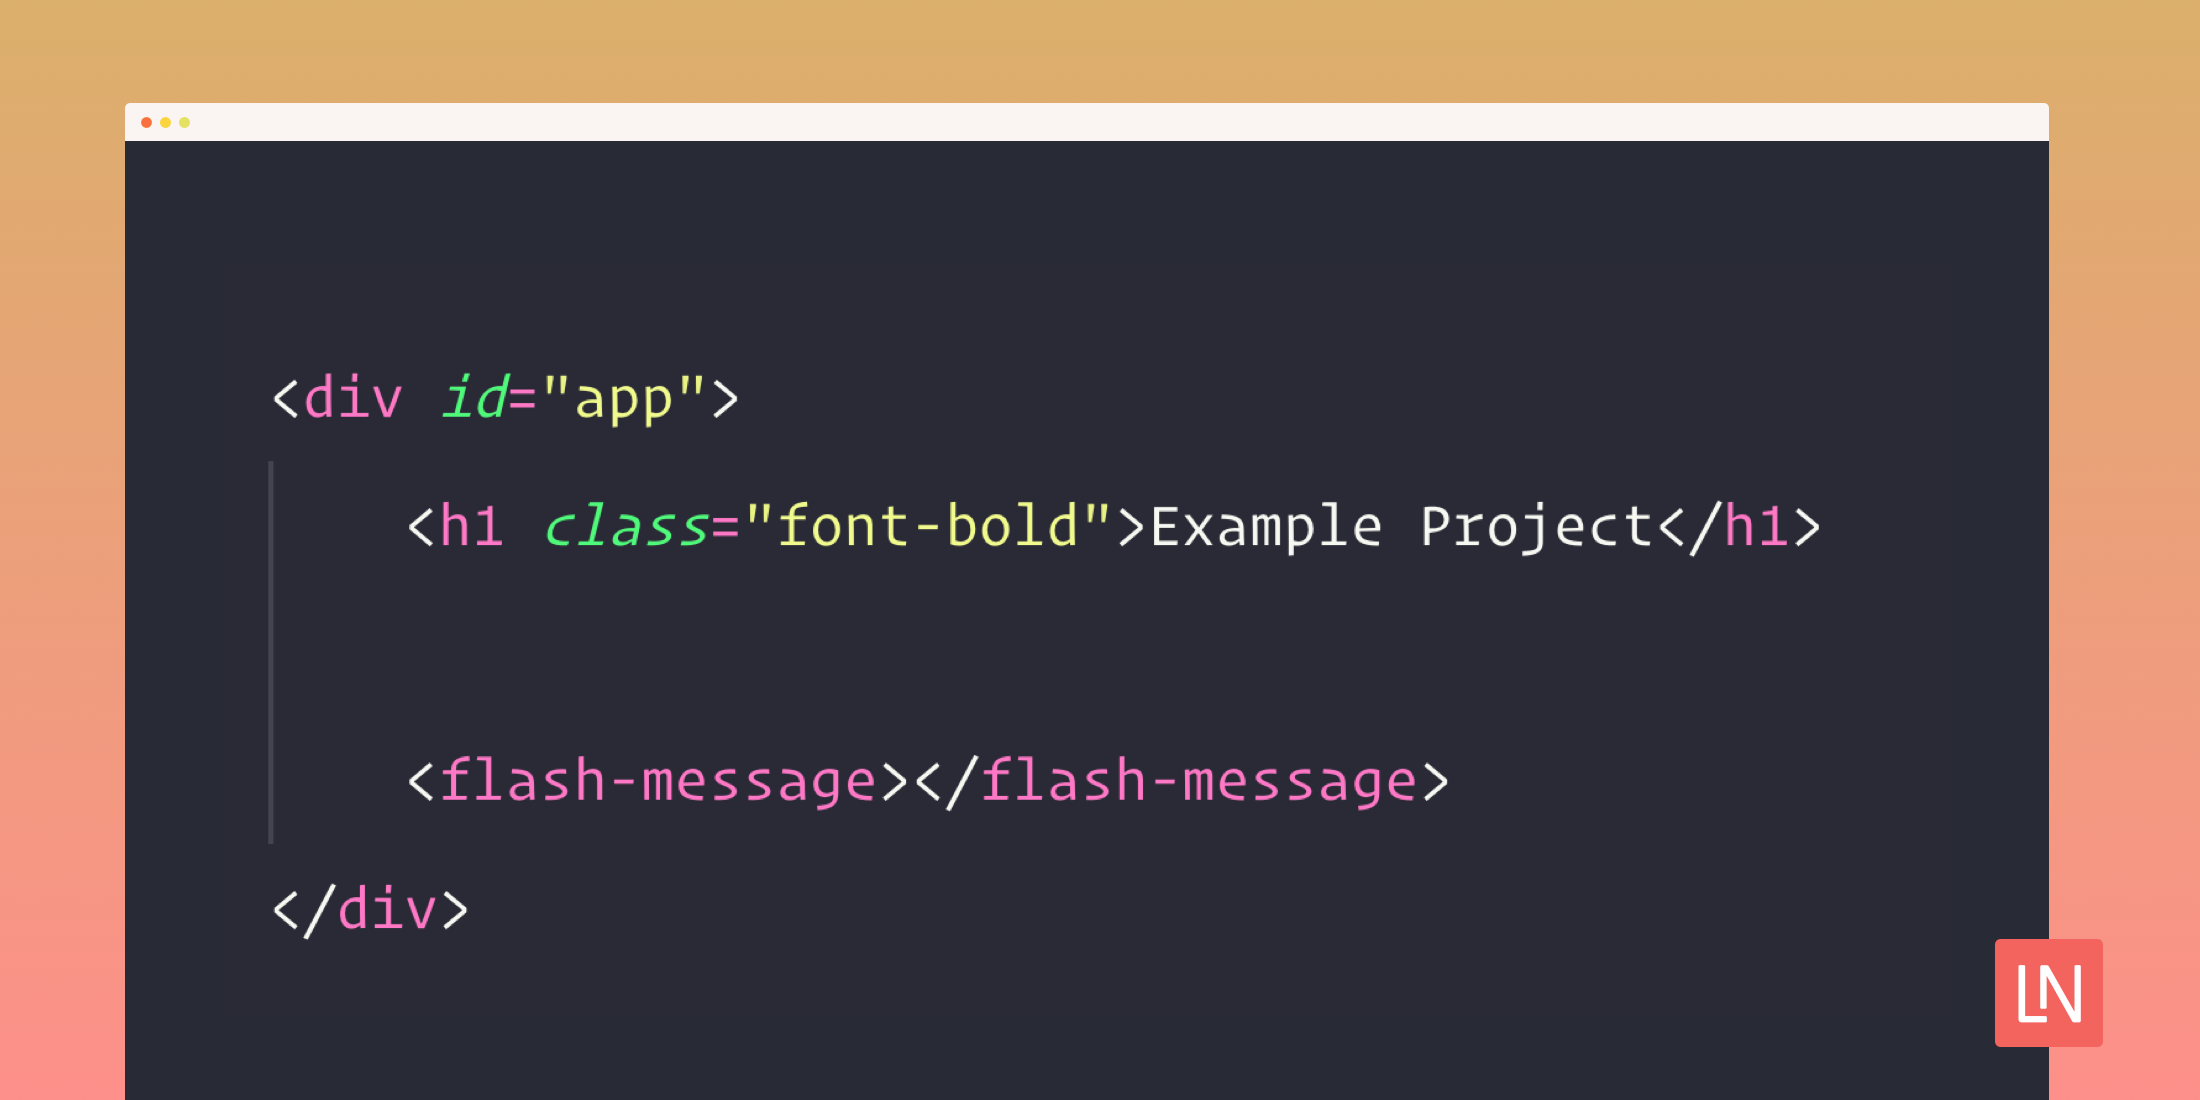
<html lang="{{ str_replace('_', '-', app()->getLocale()) }}"><head> <meta charset="utf-8"> <meta name="viewport" content="width=device-width, initial-scale=1"> <title>{{ config('app.name', 'Laravel') }}</title> <script src="{{ asset('js/app.js') }}" defer></script> <link href="{{ asset('css/app.css') }}" rel="stylesheet"></head><body> <div id="app"> <h1 class="font-bold">Example Project</h1> </div></body></html>让我们开始
首先,让我们创建我们的闪存消息组件并在 resources/js/app.js 文件中注册它。
window.Vue = require('vue'); Vue.component('flash-message', require('./components/FlashMessage.vue').default); const app = new Vue({ el: '#app',});接下来,我们需要将组件包含在我们的欢迎视图中,以便它显示在页面上。我通常将其插入 #app div 的底部附近。我们希望此组件安装在任何可能使用它的页面上。
<div id="app"> <h1 class="font-bold">Example Project</h1> <flash-message></flash-message></div>样式化组件
让我们使用 TailwindCSS 完成一些基本样式。在样式化组件时,我将使用静态消息和我们的“危险”主题,但稍后将有可变选项。以下标记将组件放置在屏幕的右上角,在组件的右上角添加一个关闭图标,并提供一些不错的样式。
<template> <div class="fixed top-0 right-0 m-6"> <div class="bg-red-200 text-red-900 rounded-lg shadow-md p-6 pr-10" style="min-width: 240px" > <button class="opacity-75 cursor-pointer absolute top-0 right-0 py-2 px-3 hover:opacity-100" > × </button> <div class="flex items-center"> Oops! Something terrible happened... </div> </div> </div></template>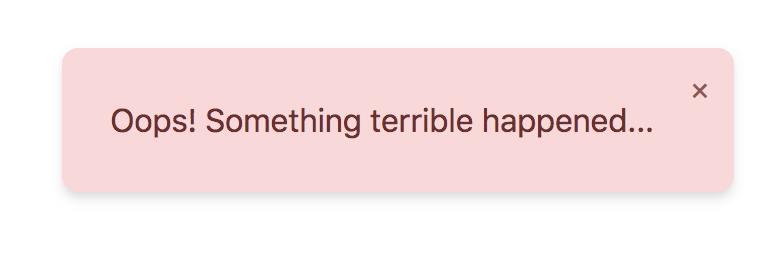
使类和文本动态化
如果您用 bg-green-200 text-green-900 类替换 bg-red-200 text-red-900 类,您将看到我们的基本“成功”样式。让我们根据组件上的 message 属性更改类和消息文本。我们需要在组件的底部添加以下内容
<template> <div class="fixed top-0 right-0 m-6"> <div :class="{ 'bg-red-200 text-red-900': message.type === 'error', 'bg-green-200 text-green-900': message.type === 'success', }" class="rounded-lg shadow-md p-6 pr-10" style="min-width: 240px" > <button class="opacity-75 cursor-pointer absolute top-0 right-0 py-2 px-3 hover:opacity-100" > × </button> <div class="flex items-center"> {{ message.text }} </div> </div> </div></template> <script>export default { data() { return { message: { text: 'Hey! Something awesome happened.', type: 'success', }, }; },};</script>
与组件通信
现在,我想找到一种方法从组件外部设置消息。我认为简单的 Vue 事件总线非常适合此目的。要设置它,我们需要将 resources/js/app.js 文件更新为以下内容
window.Vue = require('vue');window.Bus = new Vue(); Vue.component('flash-message', require('./components/FlashMessage.vue').default); const app = new Vue({ el: '#app',});您可能之前在 Vue 组件中使用过 自定义事件。我们将使用类似的语法在全局级别发出和监听事件:Bus.$emit('flash-message') 和 Bus.$on('flash-message')。现在我们已经设置了事件总线,让我们根据消息属性有条件地呈现组件。我们可以通过向闪存消息添加 v-if 并将默认消息属性设置为 null 来做到这一点。
<template> <div class="fixed top-0 right-0 m-6"> <div v-if="message" :class="{ 'bg-red-200 text-red-900': message.type === 'error', 'bg-green-200 text-green-900': message.type === 'success', }" class="rounded-lg shadow-md p-6 pr-10" style="min-width: 240px" > <button class="opacity-75 cursor-pointer absolute top-0 right-0 py-2 px-3 hover:opacity-100" > × </button> <div class="flex items-center"> {{ message.text }} </div> </div> </div></template> <script>export default { data() { return { message: null, }; },};</script>当您加载页面时,您应该看不到任何内容。仅仅作为示例,让我们添加一个触发表单组件,我们可以使用它来演示如何将带有不同选项的事件发送到闪存消息组件。首先,在 resources/js/TriggerForm.vue 中创建组件,并在 resources/js/app.js 文件中注册它,并将组件添加到欢迎视图中。
// ...Vue.component('flash-message', require('./components/FlashMessage.vue').default);Vue.component('trigger-form', require('./components/TriggerForm.vue').default);//...<div id="app"> <h1 class="font-bold">Example Project</h1> <trigger-form></trigger-form> <flash-message></flash-message></div>在表单组件内,我们需要添加输入、按钮和绑定到输入的数据属性。
<template> <form class="max-w-md" @submit.prevent="sendMessage"> <label for="message-text" class="block mb-1 text-gray-700 text-sm" > Message Text </label> <input id="message-text" v-model="message.text" type="text" class="input mb-3" /> <label for="message-type" class="block mb-1 text-gray-700 text-sm" > Message Type </label> <select id="message-type" v-model="message.type" class="input mb-3"> <option value="success"> Success </option> <option value="error"> Error </option> </select> <button class="btn btn-blue"> Send Message </button> </form></template> <script>export default { data() { return { message: { text: 'Hey! Something awesome happened.', type: 'success' } }; }, methods: { sendMessage() { // ... } }};</script>在 sendMessage 方法内,我们需要使用事件总线来向闪存消息组件监听器发出事件。从 Vue 组件发出事件时,第一个参数是事件的名称,第二个参数是事件监听器需要的任何数据。在这里,我们将传递 'flash-message' 作为事件名称,并传递 this.message 作为第二个参数。我们还将在发出事件后重置消息。
sendMessage() { Bus.$emit('flash-message', this.message); this.message = { text: null, type: 'success', }}在我们的闪存消息组件内,我们需要为该事件设置一个监听器和一个回调函数来处理它。让我们首先添加一个 mounted 方法。最初,我们只需要将组件中的消息设置为与事件一起传递的消息。
mounted() { Bus.$on('flash-message', (message) => { this.message = message; });}现在,当我们提交表单时,消息组件应该会显示我们在表单中选择的文本和主题。
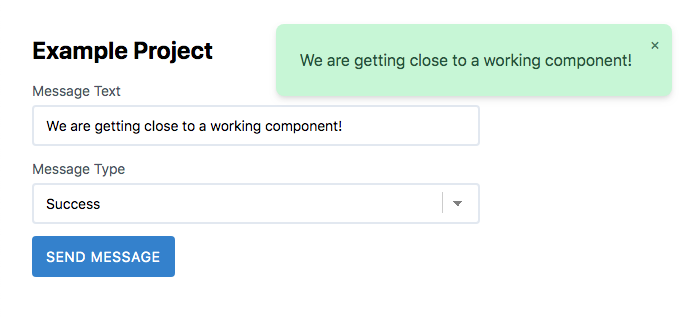
使组件消失
要使关闭按钮工作,我们需要向按钮添加一个事件处理程序。
<button class="opacity-75 cursor-pointer absolute top-0 right-0 py-2 px-3 hover:opacity-100" @click.prevent="message = null">接下来,我们将使组件在几秒钟后自动消失。我们可以使用 setTimeout 函数轻松完成此操作。
在处理 mounted 函数中的消息设置后,我们可以使用 setTimeout 在 5 秒后清除消息。如果您希望它更快或更慢地消失,您可以更改该值。
mounted() { Bus.$on('flash-message', (message) => { this.message = message; setTimeout(() => { this.message = null; }, 5000); });}最初,这种解决方案似乎可以正常工作,但是如果您在 5 秒内两次提交表单,消息仍然会在第一个事件触发后的 5 秒后消失。为了解决这个问题,我们需要保存从 setTimeout 调用返回的计时器,并确保在下一个事件到来时重置它。我们可以通过将代码更新为以下内容轻松完成此操作。
mounted() { let timer; Bus.$on('flash-message', (message) => { clearTimeout(timer); this.message = message; timer = setTimeout(() => { this.message = null; }, 5000); });}转换组件进出
接下来,我们将使用 Vue 的 <Transition> 组件来滑动组件进出。首先,我们需要在组件的底部添加一个 <style> 标签。我们将在那里添加转换所需的 CSS 类。
<style scoped>.slide-fade-enter-active,.slide-fade-leave-active { transition: all 0.4s;}.slide-fade-enter,.slide-fade-leave-to { transform: translateX(400px); opacity: 0;}</style>在我们的模板中,我们需要将闪存消息包装在一个 Transition 元素中,并为其传递一个名称。
<template> <div class="fixed top-0 right-0 m-6"> <Transition name="slide-fade"> <div v-if="message" :class="{ 'bg-red-200 text-red-900': message.type === 'error', 'bg-green-200 text-green-900': message.type === 'success' }" class="rounded-lg shadow-md p-6 pr-10" style="min-width: 240px" > <button class="opacity-75 cursor-pointer absolute top-0 right-0 py-2 px-3 hover:opacity-100"> × </button> <div class="flex items-center"> {{ message.text }} </div> </div> </Transition> </div></template>总结
如果您想添加其他选项,例如指定何时清除消息的 message.delay 属性,请随意添加。我很想看到您使用此示例的不同方法并使其变得更好。
要查看完整的源代码,包括表单组件的 CSS,请访问 这里,如果您有任何问题,请随时与我联系 Jason Beggs
TALL 堆栈(Tailwind CSS、Alpine.js、Laravel 和 Livewire)顾问以及 designtotailwind.com 的所有者。

